Find and evaluate NuGet packages for your project
When you start a .NET project, or identify a functional need in your app or service, you can often install existing NuGet packages to save the time and trouble of creating your own packages. Existing packages can come from the nuget.org public collection, or from private sources that your organization or another party provide.
Find packages
You can find packages directly at https://nuget.org/packages, or from the Visual Studio Package Manager UI or Package Manager Console with nuget.org as a source. All packages from nuget.org are routinely scanned for viruses.
At nuget.org/packages, you see a list of NuGet packages with the most popular packages across all .NET projects listed first. Some of these packages might be useful for your projects.
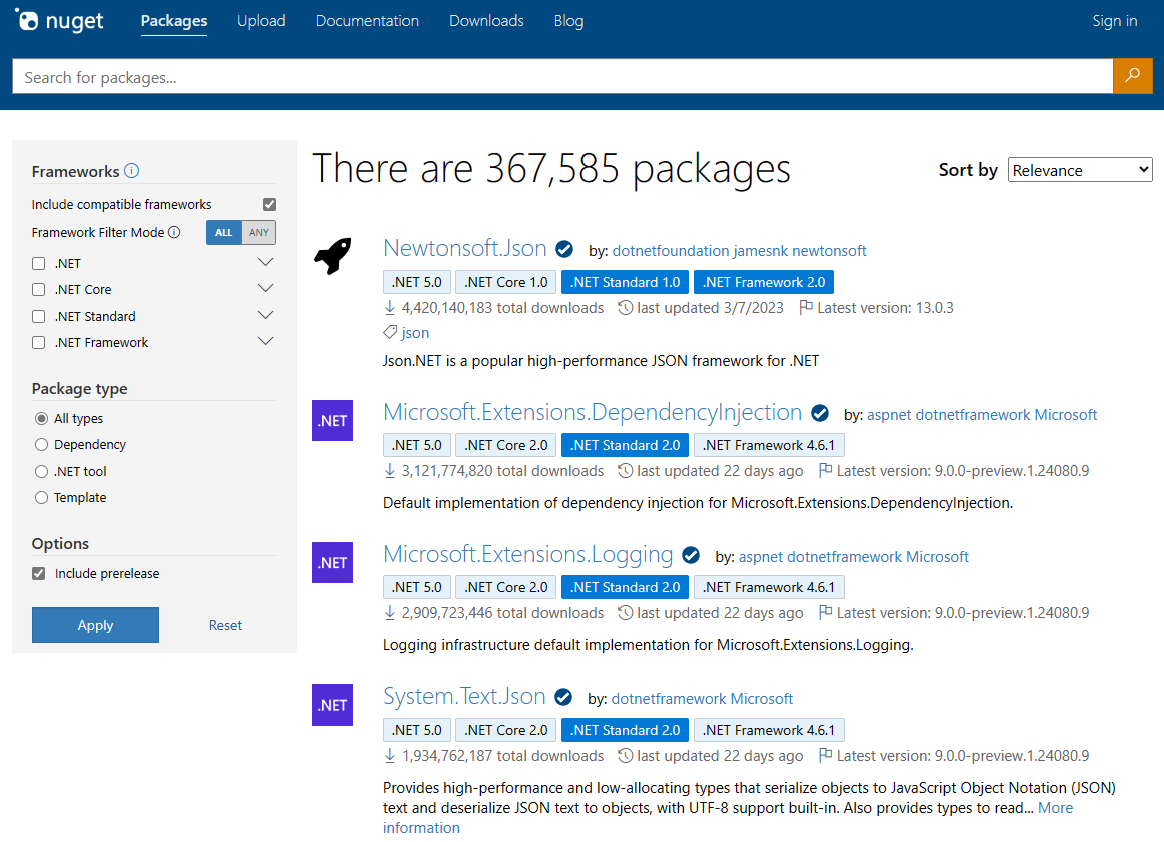
To search for a package, enter the package name or search terms in the Search box at the top of the page. You can use advanced search syntax to filter your search.
Advanced filtering and sorting
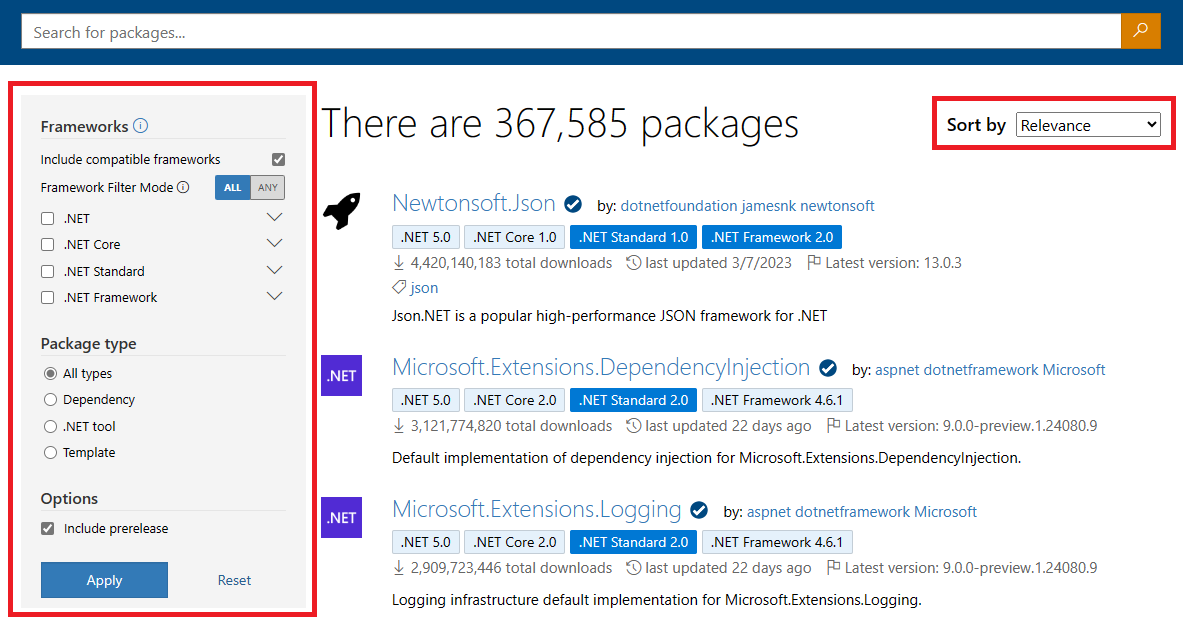
At nuget.org/packages, you can refine your search results by making use of the advanced filtering and sorting options.
Use the Frameworks filters to show packages targeting specific .NET frameworks (To learn more, see Target Frameworks):
Selecting one of the .NET framework generation checkboxes would filter the search results to packages compatible with any of the individual Target Frameworks within that generation. For example, selecting
.NETwill return packages compatible with any of the modern .NET frameworks, includingnet5.0throughnet8.0.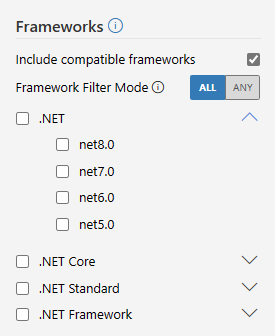
Expanding one of these framework generations with the arrows on the right will show you individual Target Framework Monikers (TFMs) that you can filter your results by. For example, selecting
net5.0will return packages compatible with the '.NET 5.0' framework.By default, packages are filtered by their expanded list of computed compatible frameworks. If you want to filter packages purely by the asset frameworks they explicitly target, deselect the Include compatible frameworks checkbox.
Combining multiple framework filters will show you search results that match all of your selected filters, i.e. packages that fall in the intersection of your selections. For example, selecting
netcoreapp3.1andnet45together will show packages that target both '.NET Core 3.1' and '.NET Framework 4.5'. Selecting the.NET Coreframework generation checkbox and thenet45checkbox together will return packages that target '.NET Framework 4.5', and at least one of the '.NET Core' TFMs (netcoreapp1.0throughnetcoreapp3.1).- Alternatively, if you want to see packages matching any one of your framework filters, select the Any radio button on the Framework Filter Mode option. Now, selecting
netcoreapp3.1andnet5.0will show packages that target either '.NET Core 3.1' or '.NET 5.0'. Selecting thenetcoreapp3.1checkbox and the.NETframework generation checkbox together will return packages that target '.NET Core 3.1' or any one of the '.NET' TFMs (net5.0throughnet8.0).
- Alternatively, if you want to see packages matching any one of your framework filters, select the Any radio button on the Framework Filter Mode option. Now, selecting
You can learn more on how to evaluate a package's supported frameworks and its compatibility with your project here.
Use the Package type filter to show packages of a specific type:
- All types is the default and shows all packages regardless of type.
- Dependency filters to regular NuGet packages that you can install into your project.
- .NET tool filters to .NET tools packages that contain console applications.
- Template filters to .NET templates that you can use to create new projects with the dotnet new command.
By default, NuGet lists all versions of packages, including prerelease and beta versions. In the Options section, deselect the Include prerelease checkbox to list only stable, released package versions.
To apply changes, select Apply. To get back to the defaults, select Reset.
Use the Sort by dropdown on the top-right of the page to sort the list by several criteria:
- Relevance is the default, and sorts results according to an internal scoring algorithm.
- Downloads sorts the search results by the total number of downloads, in descending order.
- Recently updated sorts the search results by the latest package version creation date, in descending chronological order.
Search syntax
Package search queries at nuget.org, from the NuGet CLI, and from within Visual Studio all use the same syntax. Other package sources, like Azure Artifacts or GitHub Package Repository, might use different syntax or might not support advanced filtering.
You can search the package
id,packageid,version,title,tags,author,description,summary, orownerproperties by using the syntax<property>:<term>.Search applies to keywords and descriptions, and is case-insensitive. For example, the following strings all search the
idproperty for the stringnuget.core:id:NuGet.Core
ID:nuget.core
Id:NUGET.CORESearches on the
idproperty match substrings, whilepackageidandowneruse exact, case-insensitive matches. For example:PackageId:jquerysearches for the exact package IDjquery.
Id:jquerysearches for all package IDs that contain the stringjquery.You can search for multiple values or properties at the same time. For example:
id:jquery id:uisearches for multiple terms in theidproperty.
id:jquery tags:validationsearches for multiple properties.Search ignores unsupported properties, so
invalid:jquery uiis the same as searching forui, andinvalid:jqueryreturns all packages.
Determine supported frameworks
NuGet installs a package into a project only if the package's supported .NET frameworks include the project's target frameworks. If the package isn't compatible, NuGet issues an error.
There are several ways to determine the frameworks that a package supports:
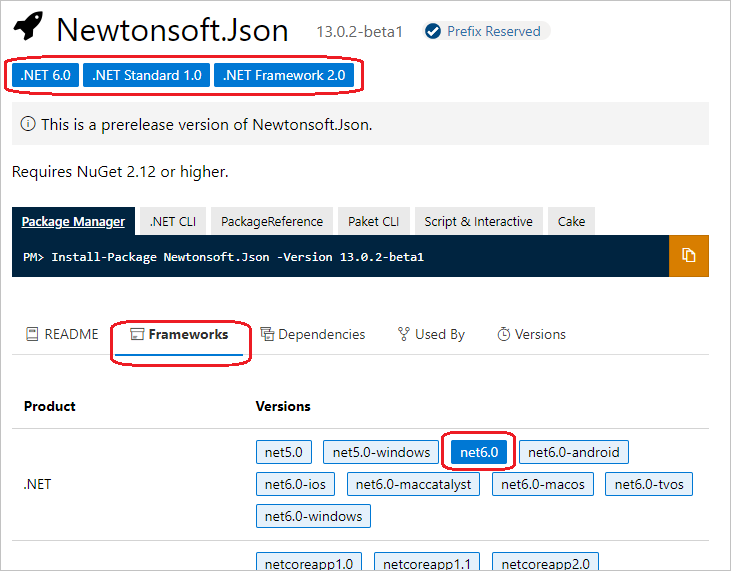
On the search page, a package's supported frameworks will appear as badges below the package ID. These badges show the lowest supported framework versions from the .NET, .NET Core, .NET Standard, and .NET Framework generations. The package will be compatible with any framework version that's equal to or higher than the badge version shown.
'Dark blue' badges represent explicitly targeted frameworks, while 'light blue' badges represent computed compatible frameworks.
Clicking on a badge will redirect you to the package's details page on nuget.org. The Frameworks tab on the package's page will show the full list of supported frameworks.

On the package's page at nuget.org, supported frameworks appear below the package ID and on the Frameworks tab, but not all packages show supported frameworks.
Download the package manually by selecting Download package under About. Change the file extension of the downloaded package from .nupkg to .zip, open the .zip folder, and examine its lib folder. There are subfolders for each supported framework, each named with a target framework moniker (TFM). For more information, see Target Frameworks. If there aren't any subfolders under lib and there's only a single DLL, try to install the package to discover its compatibility.
Try to install the package into a project by using Install-Package in the Visual Studio Package Manager Console. If the package is incompatible, the console output shows the package's supported frameworks.
Prerelease packages
Many package authors provide preview and beta releases as they continue to improve and seek feedback on latest revisions. By default, nuget.org shows prerelease packages in its package list and search results.
To list and search only stable releases:
- At nuget.org, deselect the Include prerelease checkbox in the advanced search panel.
- In the Visual Studio NuGet Package Manager UI, deselect the Include prerelease checkbox next to the Search box.
The Visual Studio Package Manager Console, NuGet CLI, and dotnet CLI tools don't include prerelease versions by default. To include prerelease versions:
In the Package Manager Console, use the
-IncludePrereleaseswitch with theFind-Package,Get-Package,Install-Package,Sync-Package, andUpdate-Packagecommands. For more information, see the PowerShell Reference.For the NuGet CLI, use the
-prereleaseswitch with theinstall,update,delete, andmirrorcommands. For more information, see the NuGet CLI reference.For the dotnet CLI, specify a prerelease version with the
-vargument. For more information, see the dotnet add package reference.
Native C++ packages
Visual Studio C++ projects can use native C++ NuGet packages. Installing these packages enable the Manage NuGet Packages context-menu command, exposes a native target framework, and provides MSBuild integration.
To find native packages on nuget.org/packages, search by using tag:native. Such packages typically provide .targets and .props files, which NuGet imports automatically when adding the packages.
Evaluate packages
The best way to evaluate a package's usefulness is to try it out. You take a dependency on a package when you use it, so you must make sure it's robust and reliable. However, installing a package and directly testing it is time-consuming. You can learn a lot about a package's quality by using the information on the package's page at nuget.org/packages.
The Prefix Reserved checkmark next to the package ID on the packages list and the package page means the package owners have applied for and been granted a reserved package ID prefix. To meet the ID prefix reservation criteria, package owners must clearly identify themselves and their packages.

Downloads in the package page's right column shows Total, Current version, and Per day average downloads. Large numbers indicate that the package has proven itself among many developers.
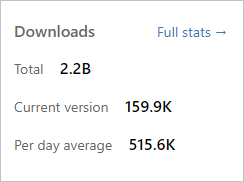
Select Full stats next to Downloads to see a page that shows package downloads for the past six weeks by version number. Versions that more developers are using are typically better choices.
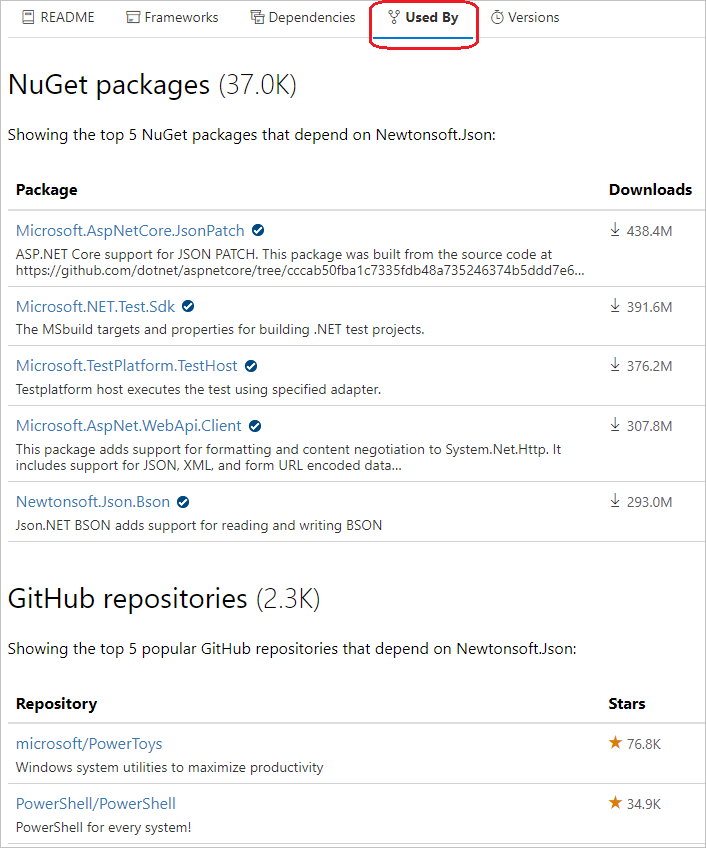
The Used By tab on the package page shows the top five most popular nuget.org packages and GitHub repositories that depend on this package. Packages and repos that depend on this package are called dependents. Dependent packages and repos can be seen as endorsing this package, because they chose to trust and depend on it.
The latest stable version of a dependent package must depend on any version of this package. This definition ensures that listed dependent packages are an up-to-date reflection of package authors' decisions to trust and depend on the package. The dependents list doesn't show prerelease dependents, because they're not considered wholehearted endorsements yet. The following examples show which packages show as dependents:
Dependent package version Dependent package listed as a dependent? v1.0.0
v1.1.0 (latest stable) depends on this package
v1.2.0-previewTRUE, latest stable version depends on this package v1.0.0 depends on this package
v1.1.0 (latest stable)
v1.2.0-previewFALSE, latest stable version doesn't depend on this package v1.0.0 depends on this package
v1.1.0 (latest stable)
v1.2.0-preview depends on this packageFALSE, latest stable version doesn't depend on this package The number of stars for a GitHub repository indicates its popularity with GitHub users. For more information about the GitHub star and repository ranking system, see About stars.
Note
The Used By section is automatically generated periodically, without human review, and solely for informational purposes.
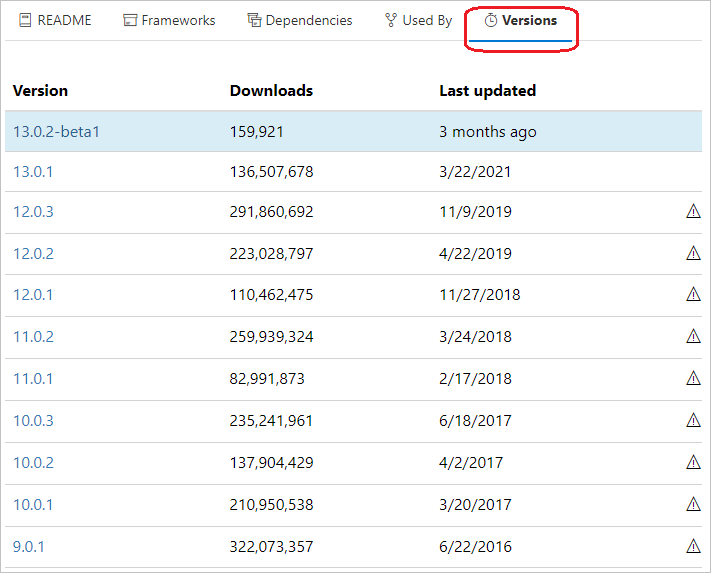
The Versions tab on the package page shows the Versions, Downloads, Last Updated dates, and serious vulnerabilities of package versions. The version you install shouldn't have any high-severity vulnerabilities. A well-maintained package has recent updates and a long version history. Neglected packages have few and long-ago updates.
The right column of the package page has other informative links:
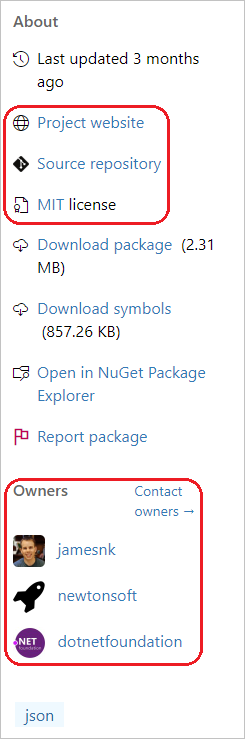
Select Project website, if available, to see what support options the author provides. A project with a dedicated site is generally well supported.
Select Source repository to go to the Git source code repository for the package. Many authors maintain their packages in open-source repositories, so users can directly contribute bug fixes and feature improvements. The package's contribution history is a good indicator of how many developers are actively involved.
Select <license type> license to see the package's MIT or other license. If a package doesn't specify license terms, contact the package owner.
Select any of the package owners under Owners to see other packages they've published. Owners with multiple packages are more likely to continue supporting their work. Select Contact owners next to Owners to reach out directly to the package developers.
Retrieve license information
Some NuGet clients and NuGet feeds might not be able to surface licensing information. To maintain backward compatibility in such cases, the license URL points to this document about how to retrieve the license information.
If selecting the license URL for a package brings you to this page, it implies the package contains a license file and:
- You're connected to a feed that doesn't know how to interpret and surface the license information to the client, or
- You're using a client that doesn't know how to interpret and read the license information the feed provides, or
- A combination of both of these scenarios.
To read the information in the license file inside the package:
- Manually download the package, and unzip its contents to a folder.
- Open the .nuspec file at the root of the folder.
- Examine the
<license>tag, such as<license type="file">license\license.txt</license>. The example tag states that the license file is named license.txt and is inside a subfolder called license. - Navigate to the specified location and open the specified file.
For information about the MSBuild equivalent to setting the license in the .nuspec, see Packing a license expression or a license file.
Next steps
Feedback
Coming soon: Throughout 2024 we will be phasing out GitHub Issues as the feedback mechanism for content and replacing it with a new feedback system. For more information see: https://aka.ms/ContentUserFeedback.
Submit and view feedback for